Installing
Code RealTime can be installed in IDEs that support Visual Studio Code extensions. This obviously includes Visual Studio Code itself, but also many other IDEs such as IBM Bob, Cursor, Windsurf, Eclipse Theia, DevOps Code and others.
The latest version of Code RealTime is available on the Visual Studio Marketplace and on the Open VSX Registry. To install that version into your IDE follow these steps:
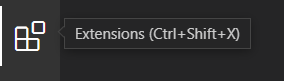
1) Click "Extensions" in the activity bar to open the Extensions view.
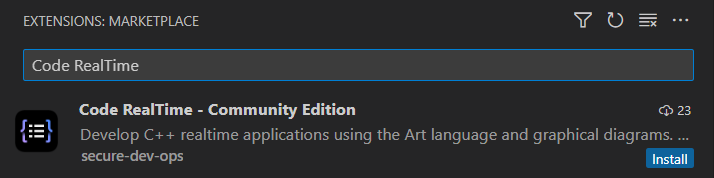
2) Type "Code RealTime" in the search field.
3) Click the "Install" button to install the Code RealTime extension
Once the installation is finished you will see Code RealTime appear in the "Installed" section of the Extensions view:
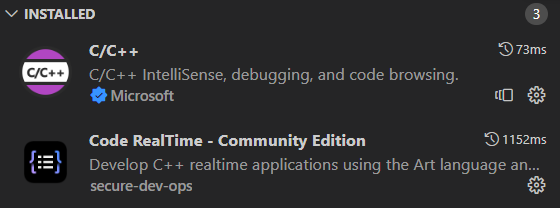
The screenshot above also shows that an extension for working with C/C++ has been installed. See Setup C++ Build Tools for more information.
After you have installed Code RealTime it's recommended to restart the IDE, or at least to perform the command Developer: Reload Window which is available in the Command Palette (Ctrl+Shift+P).
Install from VSIX
Another way to install Code RealTime is to use a .vsix file. This can be useful if you want to install another version than the latest. You can download .vsix files for all released versions of Code RealTime from both the Visual Studio Marketplace and the Open VSX Registry (click "Version History"). Once you have downloaded the .vsix file follow these steps to install it:
1) If you already have a version of Code RealTime installed, you can manually uninstall it first (see Uninstall). Note that this step is usually not required since the newly installed version of the extension will automatically replace the old one.
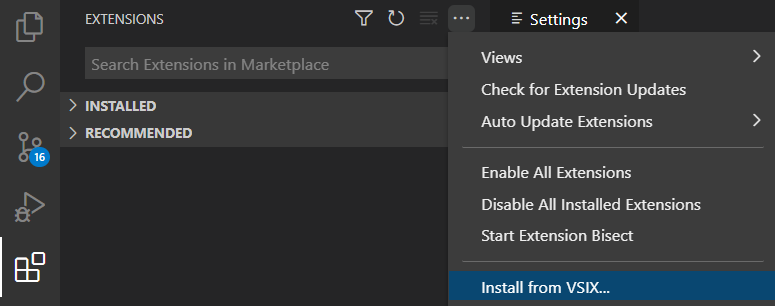
2) Open the menu of the Extensions view and select the command Install from VSIX.
3) In the file dialog that appears, select the .vsix file to install.
If the installation completes successfully you should see the following message:

If instead the installation fails, this message will tell you the reason. One common reason for failure is that your IDE version is not compatible (i.e. too old) for Code RealTime.
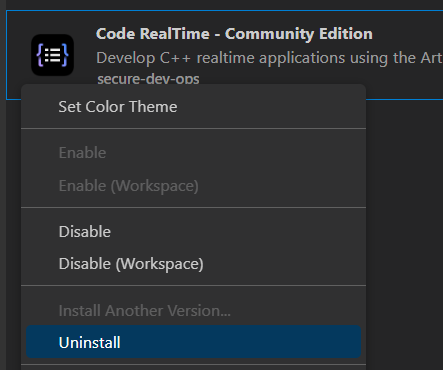
It should also be noted that it's possible to directly install any published version of Code RealTime by using the "Install Another Version" command that is available in the context menu of an extension shown in the "Installed" section.
Install from Docker Image
Yet another way to install Code RealTime is to use the Docker image that is available on DockerHub: https://hub.docker.com/r/baravich/vscode-code-realtime
It contains everything you need to running Code RealTime; a web-based version of Visual Studio Code (openvscodeserver), C++ build tools, the Clangd extension and of course the Code RealTime extension itself.
Here is an example of a command to use for running this Docker image:
docker run -p 4000:3000 -e isDocker=true baravich/vscode-code-realtime
The first port number should be a port that is available on your computer, and the second port number specifies the port used by the Docker container. With the command used above you can, a couple of minutes later, access Code RealTime from a web browser at http://localhost:4000.
Note
The Docker image is only intended for trials and evaluations as a quick way to get started with Code RealTime. The image may not always contain all the latest security fixes and should therefore not be used for production installations.
Viewing Installation Information
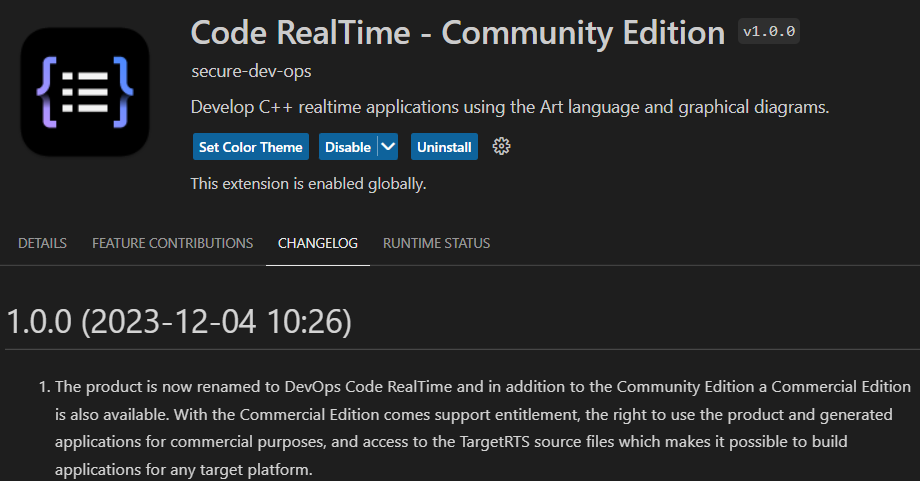
If you are unsure about which version of Code RealTime you have installed, you can see the version in the extension's tooltip, and the full build version is available in the page that appears if you double-click the extension:

You can also see the version and the exact date of the installed Code RealTime in the Changelog that is present on the extension's page. There you can also see what has been fixed and improved compared to older releases. Note that for Theia this information is not present on the extension's page, but you can see it if you double-click on the extension's name (the web page of the extension will then open).
Portable Mode Installation
You can install multiple versions of Code RealTime by using the portable mode of Visual Studio Code. See Portable Mode for how to install Visual Studio Code in portable mode, which will allow you to install a version of Code RealTime that won't affect other Visual Studio Code installations on the machine. Portable mode also allows to move or copy an installation from one machine to another, which makes it useful in scenarios where installs should be centralized in an organization.
Post-Installation Configuration
After a successful installation you need to perform a few configuration steps before you can start to use Code RealTime.
Setup Java
Code RealTime uses a Java language server and hence needs a Java Virtual Machine (JVM). It's required to use a JVM for Java 21 or newer. If an appropriate JVM cannot be found when the Code RealTime extension is activated (which for example happens the first time you open an Art file), you will receive an error message.
Code RealTime follows the steps below in priority order when it looks for an appropriate JVM to use:
1) The setting code-rt.languageServer.jvm is examined. If it specifies a path to a JVM it will be used. You can edit this setting by invoking File - Preferences - Settings and then type the setting id mentioned above in the filter box.

2) The environment variable JAVA_HOME is examined. If it specifies a path to a JVM it will be used.
3) An attempt is made to launch the java command without using a path. The first JVM found in the system path, if any, will be used.
You may also need to adjust the arguments for the JVM. By default the JVM is launched with the below argument:
-Xmx4024m
To change the JVM arguments set the setting code-rt.languageServer.jvmArgs shown in the image above.
When the Code RealTime extension is activated information about which Java that is used is printed to the Art Server output channel.
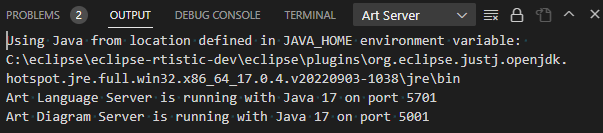
Here you will also see if the launching of the language server for some reason failed.
Setup C++ Build Tools
When Code RealTime builds generated C++ code it uses C++ build tools such as a make tool, a C++ compiler, a C++ linker etc. These tools need to be in the path when you start your IDE. If you have multiple C++ build tools installed, make sure the correct ones are present in the path before launching your IDE. For example, if you use the Microsoft C++ compiler, it's recommended to launch from a Visual Studio native tools command prompt with the correct version (e.g. 32 bit or 64 bit). Build errors caused by inconsistent versions of C++ build tools being used can be tricky to find.
Install C++ Extension
You also need to install an extension for C/C++ development into your IDE. This is required to get good support for editing C++ files in the IDE (content assist, navigation, syntax coloring etc). Even if you can use any C/C++ extension, Code RealTime provides the best integration with either C/C++ for Visual Studio Code or clangd, so you should install one of them.
Uninstall
To uninstall Code RealTime follow these steps:
1) Click "Extensions" in the left side-bar.
2) Find the Code RealTime extension in the "Installed" section and invoke the "Uninstall" command (in Visual Studio Code the command is available in the context menu, while in Theia it shows up as a button to click).
Once the uninstallation is finished you will no longer see Code RealTime in the "Installed" section.